Womenswear 2021
The Night Court Inspired Collection: From Fiction to Reality
Textiles
Week 13/Stu Vac: Textiles
I spent about 2 days pinning all of the scales onto the dress so that they were exactly where I wanted them. By the time I had finished this and started hand sewing the scales onto the dress I had about 4 days left to make look 2 without finishing sewing all the scales to the dress. So after spending about 10 hours sewing scales onto the bodice, I asked my mum and grandmother to stitch the rest of them onto the dress, exactly where I had pinned them. While they did this, I made the top and pants. Because I was so short on time, I decided to turn the embroidery on the pants into a placement embroidery on the back of them. Ultimately I think this was more effective anyway as it meant the focus wasn't taken form the leather necklace.


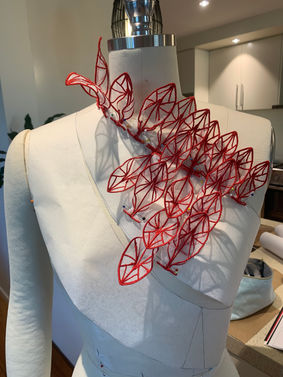
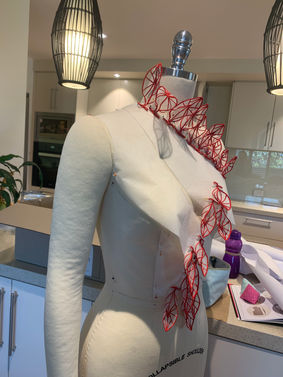
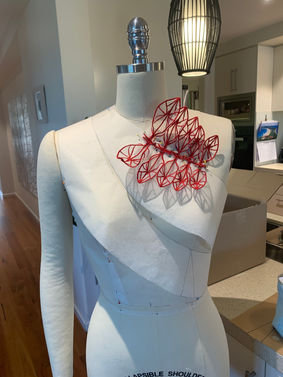
I cut out many different leathers for the scale neck piece but ultimately decided to use three of them in a chevron formation. I also updated the design of the neck piece so it was longer at the front and tested the closure parts I bought for it.


Week 12: Textiles
I created a numbering system for the scales, in order to create a pattern/system when placing them onto the dress. There are four different formations of the rhinestones, and so I numbered them accordingly. Every second scale has a different coloured rhinestone at the point. Every second scale is also a metallic thread scale. So on one row all the metallic thread scales might have a grey stone on the tip and all the normal thread scales have a red stone. Then the next row will be the opposite.
With all the different threads, rhinestones and size scales, there are 40 different scale combinations.


The scale placement on the dress went through many iterations to get the right pattern, but also the right density. On my first attempt it was too dense, so I took off half of the petals. I also found on the first attempt that I had not made enough scales and that the whole skirt was bare. So I had to make about 100 more to cover the skirt. When I discovered I didn't have enough, I decided to make the scales for the skirt in a bigger scale so that it did not look so flat. I had to order more red crystals for them. I was lucky I had just enough grey crystals left (I only have 5 spare!) as they were out of stock and were not getting any more in as Swarovski has stopped selling them.


Week 11: Textiles
This week I started working on the metallic thread scales and sewing the regular thread scales into shape. I draped with some of them to figure out if I wanted to put rhinestones on all the scales or just the plain thread ones. I decided to put rhinestones on all the scales. I also tested the star embroidery on the silk dupion. I had to reorient the embroidery design so it would stitch in a more efficient direction for cutting out the pant pieces.

Week 10: Textiles
I continued making the scales. Machine Embroidering them and attaching the rhinestones. I also decided on the final fabrics for the top and pants. I also redesigned the star embroidery for the pants so that it was less dense and more random.


Week 9: Textiles
I have re-done look 2 and so am exploring textiles for it.


Week 8: Textiles
I explored adding crystals to my look 1 embroidery.

Different crystal colour options


Final crystal colour options and placements
Stu Vac: Textiles
I draped my embroidery designs onto the calico toile for look 2. I used two different coloured embroidery threads. One being a metallic red and the other a bright red. I still have two other red colours to try. I'm not sure which one I want to use for my final dress.
I also pleated some of the cotton voile and embroidered over it as I think I might use this technique on look 1. I was very happy with the outcome, however I might reduce the number of embroidery motifs so that the pleats can move a bit more as they will need to be able to open a little bit to fit over the bust.


Week 7: Textiles
I draped my embroidery designs onto the paper toile for look 2.


Week 6: Textiles
I positioned the embroidered petals on the mannequin to figure out placement options. I also made 5 different sizes of the petals. I ran out of thread and stabiliser while making them so I need to wait for more to arrive to make more to the petals to do more placements with them.


Notes from Jo:
-Maybe a red silk base for the look
-Cut out large scales in fabric and drape with them
-Maybe put the embroidery onto a ribbon to drape with
-Asymmetrical and upright embroidery are the favourites.
-For A1 keep exploring the leather textile from week 3. Also the photos can be taken on the mannequin to show the sculptural nature of the textiles.
Week 5: Textiles
I manipulated my embroidered scales to create petal shapes.


More photos of the embroidery of jersey creating an indentation.


Embroidery on Cotton Canvas


Embroidery on Water Soluble Stabiliser with no fabric backing. The thread kept breaking and the stabiliser kept ripping.


Embroidery on Cotton voile. Had a lot of issues with the embroidery making holes in the fabric.


Jersey fabric options to match cotton toile. None of the match perfectly so I'm not sure which I will use yet.


Velvet and one of the jerseys for the pants and top toile.
Week 4: Textiles
I embroidered onto white silk organza to create scale pieces.


I bought a new Embroidery machine with a larger hoop space that I am still figuring out how to use.


I embroidered on a piece of jersey with a tear away stabiliser, it seemed to work well, though the centre of the stars/flowers did indent.
I did this repeat pattern all in one hoop, so I did not need to re-hoop it multiple times. This was the first piece I did on my new machine so you can see the first part did not work very well as I was testing different threads and rethreading the machine until I got it to work. Even after I changed the thread a few times to different brands, the thread did break quiet a few times throughout the piece.
Week 3: Textile Samples
Textile samples from Remnant Warehouse and EM Greenfields. Also samples or fabrics from my own collection.


Week 3: Machine Embroidery Textiles

Embroidery done on wash away stabiliser.

Embroidery done on organza with wash away stabiliser. Embroidery done on wash away stabiliser.

Embroidery on organza with wash away stabiliser


Embroidery on organza with wash away stabiliser

Embroidery on tear away stabiliser

Embroidery done on tear away stabiliser. Embroidery done on organza with wash away stabiliser. Embroidery done on wash away stabiliser.

Embroidery on organza with wash away stabiliser


Embroidery on satin with tear away stabiliser
Embroidery on organza with wash away stabiliser
Crystals to put on star embroidery


Notes from Jo:
-Explore 3D Embroidery and cutwork
-Try overlapping embroidery
-Try sheer scales
-The embroidery on the satin is causing too much puckering
-For the star embroidery try looking at constellations
-The sheer repeat embroidery could be used on a form fitting dress or skirt
Week 3: Leather Textiles
Pleather scales hand cut and then riveted together.


Notes from Jo:
-Look into laser cutting scales
-Try a mixed media scale piece
Week 2: Leather Textiles
Leather Scales hand cut and embroidered

Week 2: Machine Embroidery Textiles
Embroidery Scales on satin and organza.
Week 1: Repeat Scale Pattern for Embroidery Machine I designed
I designed this repeat scale pattern based on my Initial Sketch 3 textile design on the pants and top. I did it on illustrator and then had a friend convert it for my embroidery machine. However I can only embroider them one at a time as I have a very small maximum area for my machine. This was the initial test of the design.
I tested the repeat for the scales which I have to manually line up. I also tested out trying to create a star design with the * stitch which I think was very effective.


